Category: Configuration

  • Creating and Applying Diffs with Rsync

    Creating and Applying Diffs with Rsync

    At work recently, we had a need to generate diffs between two different directory trees. This is so that we can handle deploys, but it’s after we’ve already generated assets, so we can’t just use git for the diff creation, since git diff doesn’t handle files that aren’t tracked by git itself. We looked into using GNU’s diffutils, but it doesn’t handle binary files.

    We tried investigating other methods for deploying our code, but thought it would still be simplest if there was some way to generate just a ‘patch’ of what had changed.

    Luckily, one of the Staff Engineers at Etsy happened to know that rsync had just such an option hiding in its very long man page. Because rsync handles transferring files from one place to another, whether it’s local or remote, it has to figure out the diffs between files anyway. It’s really nice that they’ve exposed it so that you can use the diffs themselves. The option that does this is called ‘Batch Mode’, because you can use it to ‘apply’ a diff on many machines after you’ve distributed the diff file.

    Creating the Diff

    To create the diff itself, you’ll need to first have two directories containing your folder structure – one with the ‘previous’ version and one with the ‘current’ version. In our case, after we run each deploy, we create a copy of the current directory so that we can use that as our previous version to build our next diff.

    Your rsync command will look a lot like this:

    rsync --write-batch=diff /deploy/current /deploy/previous

    Running that command will give you two files, diff and diff.sh. You can just use the .sh file to apply your diff, but you don’t have to. As long as you remember to use the same flags when applying your diff, you’ll be fine. You can also use any filename that you want after the =.

    Also, it’s important to note that running this command will update /deploy/previous to the contents of /deploy/current. If you want to keep /deploy/previous as-is so that you can update it later, use --only-write-batch instead of just --write-batch.

    Applying the Diff

    Next up, you’ll want to distribute your diff to whatever hosts are going to receive it. In our case, we’re uploading it to Google Cloud Storage, where all the hosts can just grab it as necessary.

    On each host that’s applying the diff, you’ll want to just run something like the following:

    rsync --read-diff=/path/to/diff /deploy/directory

    Remember, you need to use the same flags when applying your diff as you did when you created your diff.

    In our testing, this worked well for applying a diff to many hosts – updating around 400 hosts in just about 1 minute (including downloading the ~30MB diff file to each host).

    Caveats

    This will fail if the diff doesn’t apply cleanly. So, essentially, if one of your hosts is a deploy behind, you should make absolutely sure that you know that, and don’t try to update it to the latest version. If you try to anyway, you’ll probably end up with errors in the best case, or a corrupt copy of your code in the worst case. We’re still working on making our scripts handle the potential error cases so that we don’t end up in a corrupt state.

    I hope this is helpful to you! If you’ve got any thoughts, questions, or corrections, drop them in the comments below. I’d love to hear them!

  • Alphabetic Filtering with Regex

    Alphabetic Filtering with Regex

    Last week, I found myself needing to filter things alphabetically, using regex. Basically, this is because PHPUnit lets you filter what tests you run with regex, and we (we being Etsy) have enough tests that we have to split them into many parts to get them to run in a reasonable amount of time.

    We've already got some logical splits, like separating unit tests from db-related integration tests and all that jazz. But at some point, you just need to split a test suite into, say, 6 pieces. When the option you have to do this is regex, well, then you just have to split it out by name.

    Splitting Tests by Name? That's not Smart.

    No, no it's not. But until we have a better solution (which I'll talk about in a later post), this is what we're stuck with. Originally, we just split the alphabet into the number of pieces we required and ran the tests that way. Of course, this doesn't result in even remotely similar runtimes on your test suites.

    Anyway, since we're splitting things up by runtime but we're stuck with using regex, we might as well use alphabetic sorting. That'll result in relatively short regular expressions compared to just creating a list of tests.

    To figure out where in the alphabet to make the splits for our tests, I downloaded all of our test results for a specific test suite and ran it through a parser that could handle JUnit-style output (XML files with the test results). I converted them into CSV's, and then loaded them into a Google Spreadsheet:

    Tests in Google Sheets

    This made it trivial to figure out where to split the tests alphabetically to even out the runtimes. The problem was, the places where it made sense to split our tests weren't the easiest places to create an alphabetic split. While it would've been nice if the ranges had been, say, A-Cd or Ce-Fa, instead they decided to be things like A-Api_User_Account_Test or Shop_Listings_O-Transaction_User_B.

    It's not easy to turn that into regex, but there is at least a pattern to it. I originally tried creating the regex myself – but quickly got in over my head. After about 100 characters in my regex, my brain was fried.

    I decided that it'd be easier, quicker, and less error-prone to write a script that could handle it for me.

    Identifying the Pattern

    It's really quite simple once you break it down. To find if a String is between A and Bob (not including Bob itself), you need a String that meets the following conditions:

    • Starts with A or a, OR
    • Starts with B or b, AND:
      • The second character is A-M or a-m OR
      • The second character is O or o, AND:
        • The third character is A or a

    In a normal 'ole regular expression, this looks like the following (ignoring all special characters):

    ^[Aa].*|^([Bb](.|[Oo]([Aa]|$)|$)).*$

    Now, if we've got something that complicated just to find something up to Bob, you can likely figure out that the rule would get much longer if you have many characters, like Beta_Uploader_Test_Runner.

    There's a recognizable pattern, but once again, it's pretty complex and hard for my weak human brain to grok when it gets long. Luckily, this is what computers are very, very good at.

    Formulating the Regex

    To get a range between two alphabetic options, you generally need 3 different regex rules. Let's say we're looking for the range Super-Whale. First, you need the range from the starting point to the last alphabetic option that still starts with the same letter. So, essentially, you need Super-Sz. The second thing you need is anything that starts with a letter between the first letter of the starting point and the first letter of the end point. So our middle range would be T-V. The last part needs to be W-Whale.

    By way of an example, here's a more simple version of the first part – in this case, it's Hey-Hz, color-coded so that you can see what letter applies to which part of the regular expression:

    Next up, we're using the same word as if it were the second part. In this case, H-Hey:

    Since the middle part is super simple, I won't bother detailing that. With those three elements, we've got our regex range. Of course, there are some more details around edge cases and whatnot, but we'll ignore those for now. It's much simpler for the purposes of blog posts.

    Doing some Test-Driven Development

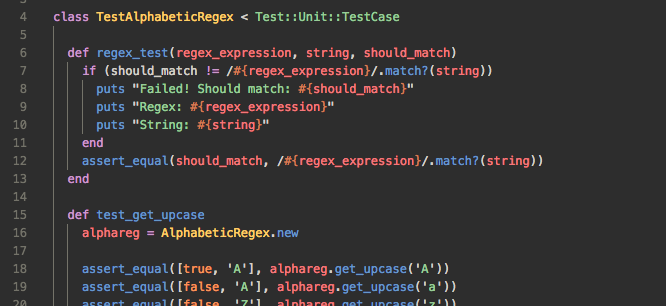
    I decided that the best way to make this, you know, actually work, was to write a bunch of tests that would cover many of the edge cases that I could hit. I needed to make sure that these would work, and writing a bunch of tests is a good way to do so.

    This helped me know exactly what was going wrong, and I wrote more tests as I kept writing the code. For every method that I wrote, I wrote tests to go along with it. If I realized that I had missed any necessary tests, I added them in, too.

    Overall, I'd say this significantly increased my development speed, and it definitely helped me be more confident in my code. Tests are good. Don't let anyone tell you otherwise.

    The Code on GitHub

    Of course, it doesn't make sense to restrict this code to just me. I couldn't find any good libraries to handle this for me, so I wrote it myself. But really, it only makes sense to make this available to a wider audience.

    I've still got some issues to work out, and I need to make a Ruby gem out of it, but in the meantime, feel free to play around with the code: https://github.com/russtaylor/alphabetic-regex

    I'm really hoping that someone else will find this code to be useful. If anyone has any questions, comments, or suggestions, feel free to let me know!

  • Moving or Distributing Your Docker Build Cache

    Recently, I hit an issue where building docker images on containers meant that the Docker cache wasn’t being persisted from one build to the next. So even if you ran an identical build on the next run, it’d still rebuild every step, costing you valuable time.

    Luckily, it’s not too difficult to save your Docker cache and to restore it (or distribute it) to other machines. It’s a bit more difficult than it used to be, but with a bit of scripting magic, it’s easy enough.

    How it Used to Be

    Apparently (though before I started working much with Docker), when you used to push a Docker image to a remote repository, it’d include all layers of that image. That means when you pulled in image, you’d get its entire history as well. This made things easier for distributing or restoring the cache, because all you had to do was pull the image. Unfortunately, it also made things clunky, in that you had to download more data than you actually needed to run the image.

    Shortly after that, Docker supported saving the entire cache using docker save -o file.tar <image_name> and restoring it using docker load -i file.tar. But now, docker save has been streamlined, too, so saving your cache isn’t quite as simple as it used to be.

    Saving Your Cache

    Luckily, despite those changes, you can still use the docker save command to get your image’s full cache – the catch is that you have to save all the layers listed in your image’s docker history.

    So, to save your image’s cache, run the following command: docker save -o output.tar $(docker history -q <image_name>[:image_tag] | tr '\n' ' ' | tr -d '<missing>')

    This runs docker history with the -q (quiet) tag, so it only shows the ids of each layer. Since you’re probably building FROM another image, much of the history will show <missing>, because you don’t have the entire history of the image you’re building FROM.

    Next up, the command pipes the output to tr twice, to clear out any \ns and any <missing> output. So, in the end, you get a list of image IDs passed directly to docker save.

    Loading Your Cache

    Loading your cache is exactly how it used to be – after you’ve copied or moved the tar file containing your cache, just run docker load -i <filename> and you’ll have your cache all ready to go!

  • Using Docker for WordPress Theme & Plugin Development

    Using Docker for WordPress Theme & Plugin Development

    In the time since I actually learned something about deploying to the web, I’ve been extremely unhappy with my WordPress development workflow. As a result, I haven’t developed any WordPress themes or plugins in quite a few years. I’ve just used themes and plugins as-is, but I’ve finally decided that I want to actually build myself a decent theme.

    WordPress Development Challenges

    There are a few challenges associated with developing on WordPress. First, you (of course) want your theme/plugin files under source control, but they still have to be inside the WordPress directory (okay, you could solve this with symlinks). But then you’re still running a local install of Apache, PHP, and MySQL, or else you’re doing your development directly on a VM or something. I generally prefer not having MySQL and Apache running all the time on my development machine. And, as you may suspect, I certainly don’t want the core WordPress files under source control. That’d just make for plenty of trouble when upgrading WordPress or installing/enabling/disabling themes or plugins.

    A Containerized Solution

    Luckily, it’s actually really easy now to set up a docker-based solution. So you can develop and run the site locally, keep your files under source control, but not have to be running an Apache/MySQL/PHP stack on your development machine (at least not directly).

    First up, you’ll need to install Docker (if you haven’t already). I won’t go into the details here, but you can get a start by heading to the Docker Community Edition page. Once you’ve got it installed, create a new directory for your project (unless you’ve already got one). Inside that directory, create a new file called docker-compose.yml.

    We’re going to use Docker Compose, which is a tool which can launch multiple containers and link them together as necessary. This is super useful for use cases like ours, because we need to set up a container for both WordPress and MySQL. In your docker-compose.yml file, put the following:

    version: '2'
    
    services: 
        wordpress: 
            image: wordpress:php7.1
            ports:
                - 8080:80
            environment:
                WORDPRESS_DB_PASSWORD: super-secure-password
            volumes:
                - ./{DIRECTORY}:/var/www/html/wp-content/{themes/plugins}/{DIRECTORY}
        mysql:
            image: mariadb
            environment:
                MYSQL_ROOT_PASSWORD: super-secure-password
    

    Of course, you’ll want to replace super-secure-password with an actual password (not quite so important for local development), and replace the two {DIRECTORY}s with the directory that you’re developing your project in. In my case, it’s a starter theme. Finally, replace {themes/plugins} with the proper directory, depending on whether you’re developing a plugin or a theme. I used themes, since I’m developing a theme.

    Now, what this is doing is telling Docker that we want two images: One ‘WordPress’ image (you can see the list of available versions on this Docker Store page) and one ‘MySQL image’. In this case, I’m using mariadb.

    We’re then configuring the containers by passing them environment variables – the same password being passed to both images. This’ll actually let them connect to each other. In case you hadn’t guessed it, these are set up by the creators of each image to allow you to configure them on-the-fly.

    Finally, we’re mapping a local directory to /var/www/html/wp-content/..., which will place our local files in the correct directory in the actual WordPress container. It’s pretty awesome.

    All you need to do now is run docker-compose up, wait for your containers to start, and then access your brand-spanking-new WordPress development site at http://localhost:8080. You’ll have to go through the installation, and if you want to, you can load in some sample data. When you want to stop it, just hit Ctrl+C in that console. Finally, you can enable your theme/plugin in your WordPress settings.

    I’ll leave it up to you to decide how exactly you want to deploy it, though.

    Conclusion

    Docker compose makes this super easy, and it takes very little configuration to get up and running. The extra bonus is that you can check your docker-compose.yml file into your source control, and then you’ve got it saved for later development (or development from another machine). All you need is Docker (and an Internet connection, at least to start).

  • User Lists in Twitch’s IRC with ZNC

    Twitch’s IRC is, well, not like most IRC. They’ve modified it in so many ways, it’s difficult to still even consider it IRC. But hey, at least we still can connect to their chat services using IRC. I guess I shouldn’t complain.

    Anyway, one of their most recent changes was removing join/part messages completely from default chat, unless you specifically request permissions. That means that your IRC client won’t see a members list at all for a channel. Luckily, a simple command still gets you the join/parts, so that you can still at least see the members list.

    All you need to do is run this IRC command before joining channels to request the capability:

    CAP REQ :twitch.tv/membership
    

    Unfortunately for me, I’m using ZNC, which makes it more difficult to run this. However, once again, a little bit of googling found a solution. All you need to do is enable the perform module and have it execute the CAP REQ command above when you join the server. To enable it on ZNC, just run the following commands in any IRC client connected to your ZNC’s Twitch instance:

    /msg *status loadmod perform
    /msg *perform add CAP REQ :twitch.tv/membership
    /msg *status disconnect
    /msg *status connect
    

    After ZNC reconnects to twitch, you should be getting membership lists from your Twitch channels!

  • Automatic Deployment with Gitolite

    About Gitolite

    About a year and a half ago, I came across a great open-source git repository management tool called Gitolite. It’s a great tool for hosting and managing git repositories. It worked especially well for me because I run my own web server where I could set it up. If you’d like to give it a try or read up on it, I suggest you visit the Gitolite documentation.

    Why Automatic Deployment?

    Now, having worked in web development for at least a few years, I wanted a simpler way to automatically deploy my sites. Ideally, this should use Git. I’ve become quite fond of Git, so I’ve been using it for all my projects lately. Before I even open a text editor to start a new project, I’ve usually already typed git init (or, as it is with Gitolite, git clone).

    There’s something to be said for entering git push and having your commits reflected live on the web. It’s not something you want for every site, but it can certainly be useful when you want it.

    Getting it Set Up

    If you’ve managed to get Gitolite set up, you probably won’t have much trouble with getting the rest figured out. If you do happen to have some questions, I’ll do my best to answer them.

    In order to set up your automatic deployment, you’ll need direct access to the gitolite account on your server. As a matter of fact, having root access would probably be helpful. Because unfortunately, the autodeployment isn’t something you can just set up using the gitolite-admin repository (for some very good security reasons, I might add). With that in mind, follow along with the steps below.

    1. Add your web server user and your gitolite user to the same group. While this probably isn’t strictly necessary, it’s what I decided to do to make it work. Mainly, you just need your web server to be able to properly access the files that your gitolite user will be checking out.

      In my case, I simply created a new group and added both users to that group using usermod (check out usermod’s man page for more info). However, as I said, you can handle this however you’d like to, especially if your UNIX knowledge surpasses mine (which certainly wouldn’t surprise me).

    2. Create your repository and deployment directory.

    3. Change your deployment directory to allow the gitolite user access. This will depend on exactly how you handled things in step 1, but if you followed my pattern, I’d suggest changing the group of the directory to the group you added in step 1. In case you aren’t completely familiar with how you do this, you can try chown user:group directory -R on your target directory (More info here).

    4. Add the following to your /home/{gitolite_user}/.gitolite/hooks/common/post-receive script:

      if [ "$GL_REPO" == "gitolite/path/to/repo" ]; 
          git --work-tree /path/to/webroot --git-dir ./ 
          find /path/to/webroot -type f -print | xargs chmod 664 
          find /path/to/webroot -type d -print | xargs chmod 775
      fi
      
    5. Modify the script (from above) as needed. Basically, this script will run any time a repo is pushed to the server. If the repo matches the path you put in, it’ll execute the script within the if statement. That simply checks the repo out to the directory you specify, then adjusts the permissions on the files and subdirectories. You can modify the script as needed, because your specific case may need some special treatment.

    6. Push to your repo!

    Hopefully I’ve covered everything. If you try this tutorial and run into problems, let me know in the comments and I’ll do what I can to get you sorted out.

  • Custom Keyboard Layouts in Windows 8 Consumer Preview

    Windows 8 Consumer Preview

    So, a few days ago, I sporadically decided to install the Windows 8 Consumer Preview on my laptop. I just wanted to get a good look at what’s coming in the next version of Windows. Now, all commenting about Windows 8 aside, I had one pretty serious issue. You see, I’ve become incredibly reliant on the Programmer Dvorak Keyboard Layout. I switched layouts just over a year ago, but it’s put me in a relatively small group of people. While Windows includes three versions of Dvorak by default, Programmer Dvorak isn’t one of them. (more…)