Category: Uncategorized

  • Working with Bare Repos in Git

    Working with Bare Repos in Git

    When we think about git and git repos, we don’t often think about separating the .git repo itself from the working directory.  But we can actually have a lot of fun with bare repos. They give you a lot of flexibility, and when you’re doing things like deploying code or running builds, that’s useful.

    Searching the web, it’s actually not super easy to find info on how to do this. I figured that writing up a post on it would be helpful both for me and for anyone who finds this.

    Creating a --bare Clone

    Cloning a repo bare is easy enough. When you run git clone, you simply include the --bare flag. It’ll create a directory that is identical to the .git directory inside your normal old git checkout. The convention is to name this directory <whatever>.git, but that’s optional. The only difference between this checkout and your normal repo’s .git directory is that the config file will have bare = true. So to wrap up, your whole clone command will look like this: git clone --bare [email protected]:<org|user>/<repo-name>.git <repo-name>.git.

    Now, because you have a bare repo, a few things are probably different from the repos that you’re accustomed to working with:

    • There’s no ‘working directory’
    • Nothing is ‘checked out’
    • You aren’t ‘on’ a branch

    The cool thing is that using a bare repo actually lets you work with a few working directories, if you want. Each working directory will be free of a .git directory, so they’ll be smaller and not contain the entire history of your project.

    Updating a Bare Repo

    To update your repo, you’re going to use a fetch command, but you’re going to specify an environment variable beforehand. You’ll want to point GIT_DIR to your bare checkout:

    GIT_DIR=~/my_repo.git git fetch origin master:master

    The master:master at the end of the command is telling git to get the changes from your origin‘s master branch and update your local master branch to match. If you want to update some other branch or from some other remote, you can adjust your command accordingly. If you’re looking to update all the branches in your repo, change out the master:master and put use --all instead.

    Checking Out from a Bare Repo

    Checking out from your bare repo is going to be almost identical to checking out anything in a normal repo, but you’ll need two environment variables specified: GIT_DIR and GIT_WORKING_DIR. Your command will look a lot like this:

    GIT_DIR=~/my_repo.git \
    GIT_WORKING_DIR=~/my_checkout/ \
    git checkout -f origin master

    The -f will discard any changes that have been made in the working directory. In most cases where you’ll be using this, that’s preferable to a failure just because something has changed in the directory.

    This command will be the same whether you’re checking it out for the first time or updating it to the latest.

    Hopefully that helps you (and me)! If you’ve got any questions or comments, of if I’ve made any errors, let me know in the comments below!

  • Wildcard Certs w/Let’s Encrypt & Cloudflare

    Wildcard Certs w/Let’s Encrypt & Cloudflare

    Awhile back, when wildcard certs first became available from Let’s Encrypt, I wrote a post about using Google Cloud DNS to create wildcard certificates. Since then, however, it’s come to my attention that Cloudflare offers DNS for free that interacts with an API. So I figured, why not move over to use Cloudflare’s DNS, instead? This post explains how to set up wildcard certs using Cloudflare’s DNS.

    Setting up Cloudflare

    Before you do anything else, you’ll need an account with Cloudflare. If you already have one, that’s great! You’ll need to import whatever domain you want to set up wildcard certs for – just follow the steps that Cloudflare gives you. The awesome thing is that Cloudflare will automatically detect your existing records (or at least try to) and import them for you. It might miss some, so just be aware and manually add any that it’s missing.

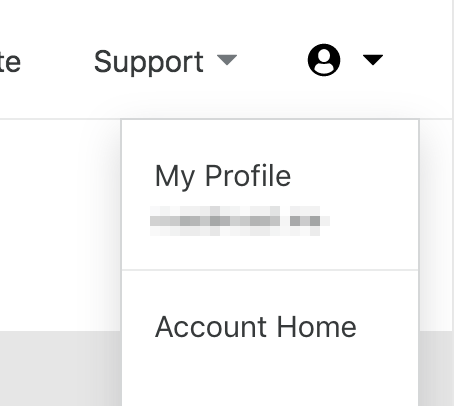
    Finally, you’ll need to retrieve your Cloudflare API key, so that certbot can add the records that Let’s Encrypt needs to verify your ownership of the domain. To do that, you’ll need to click the ‘profile’ dropdown in the top right, then click ‘My Profile’:

    'My Profile' link on Cloudflare

    Then, scroll down to the bottom of the page, where you’ll see links to get your API keys:

    API Keys section of Cloudflare

    Click ‘View’ next to show your Global API Key. Naturally, make note of this – you’ll need it later on.

    Issuing Certificates

    Like we did in our previous post, we’re going to use Docker to run certbot so that we can get our certificates without installing certbot and its dependencies. I’m doing this for the sake of simplicity, but if you’d rather avoid Docker, you’re free to install everything.

    Credentials

    To use our API key, we need to have it wherever we’re running our Docker container from. In my case, I’m running it on my web server, but you can run it from any machine. Following the Cloudflare docs from Certbot, I used the following format for my credentials:

    # Cloudflare API credentials used by Certbot
    dns_cloudflare_email = [email protected]
    dns_cloudflare_api_key = 0123456789abcdef0123456789abcdef01234567

    I placed the file in my ~/.secrets/certbot directory, called cloudflare.ini. I’ll be able to mount this directory to the Docker container later, so it’ll be available to certbot running inside the container.

    Volumes

    We’ll need to mount a few things so that our Docker container has access to them – first off, we need the credentials to be accessible. Second, we need to mount the location where the certificates will be placed, so that they persist when we shut down our container. And finally, we’ll mount the location where certbot places its backups. In the end, our Docker volume will look something like this:

    -v "/etc/letsencrypt:/etc/letsencrypt" \
    -v "/var/lib/letsencrypt:/var/lib/letsencrypt" \
    -v "/home/$(whoami)/.secrets/certbot:/secrets"

    Docker & Certbot Arguments

    Now, we just have to formulate the entire command to grab our certificate. Here’s the command we’ll be using, with the explanation below:

    sudo docker run -it --name certbot --rm \
        -v "/etc/letsencrypt:/etc/letsencrypt" \
        -v "/var/lib/letsencrypt:/var/lib/letsencrypt" \
        -v "/home/$(whoami)/.secrets/certbot:/secrets" \
        certbot/dns-cloudflare \
        certonly \
        --dns-cloudflare \
        --dns-cloudflare-credentials /secrets/cloudflare.ini \
        --server https://acme-v02.api.letsencrypt.org/directory \
        -d '*.example.com' \
        -d 'example.com'

    So here’s what we’re telling Docker to do:

    • --name certbot: Run a container named certbot
    • --rm: Remove that container after it’s run
    • -v flags: mount the volumes we specified above
    • certbot/dns-cloudflare: Run certbot’s dns-cloudflare image
    • certonly: We’re only issuing the certificate, not installing it
    • --dns-cloudflare: Tell certbot itself (inside the image) that we’re using Cloudflare’s DNS to validate domain ownership
    • --dns-cloudflare-credentials <path>: Specify the path (inside the container) to the credentials
    • --server <server>: Use the acme-v02 server, the only one that currently supports wildcard certificates
    • -d <domain-name>: Issue the certificate for the specified domain name(s)

    Since my last post, I realized that by using the -d flag twice, once for *.example.com and once for example.com, you can get a single certificate that covers example.com and all of its subdomains.

    Conclusion

    That’s really all there is to it! You’ll have a nice, new certificate sitting on your disk, just waiting to be used. If you’ve got any comments or questions, drop them in the section down below!

  • Revamping my Dotfiles with Zgen

    Revamping my Dotfiles with Zgen

    I’ve recently spent some time reworking my dotfiles repo. Up to this point, I’ve mostly just taken what someone else has made available, changed it to work just enough for me, and left it at that. Finally, I’ve put in some time to update them so that they’ll work better for me.

    As part of this transition, I’ve made the move from Antigen over to Zgen. It’s not really a big change, but I like the fact that with Zgen, you only run the update check when you want to, and not every single time that a new shell loads. Of course, this opens you up to the possibility of updating everything on a cron as well (which I’d highly recommend).

    My dotfiles were originally taken from Holman‘s dotfiles repo. As you do with dotfiles repos, I’ve modified them quite a bit since I first copied his repo, and I need to do some updating to get some of the more recent stuff that he’s added, but for now they’re working for me.

    Configuring Zgen

    Installing Zgen is easy:

    git clone https://github.com/tarjoilija/zgen.git "${HOME}/.zgen"

    Next up, you’ll need to add zgen (and install plugins) in your .zshrc file, like this:

    source "${HOME}/.zgen/zgen.zsh"
    if ! zgen saved; then
    echo "Creating a zgen save"
        zgen oh-my-zsh
    
        # plugins
        zgen oh-my-zsh plugins/git
        zgen oh-my-zsh plugins/sudo
        zgen oh-my-zsh plugins/command-not-found
        zgen load zsh-users/zsh-syntax-highlighting
        zgen load zsh-users/zsh-history-substring-search
        zgen load bhilburn/powerlevel9k powerlevel9k
        zgen load junegunn/fzf
    
        # completions
        zgen load zsh-users/zsh-completions src
    
        # theme
        zgen oh-my-zsh themes/arrow
    
        # save all to init script
        zgen save
    fi

    Those are the plugins that I’m currently using, though I’m looking for more that might be useful. Now, you get all of these awesome things without having to install them all separately, plus whatever else you add. And because you’re using Zgen, not Antigen, they’ll only update (& check for updates) when you want them to, rather than every single time that you open your shell.

    To update your plugins (which you should definitely do periodically), all you have to do is run zgen update. It really couldn’t be simpler!

    Once I get more done with my dotfiles, I’ll throw more of it up here so you can check it out. Until then, I hope this is helpful!

  • Listing & Switching Contexts in Kubernetes

    Listing & Switching Contexts in Kubernetes

    This is going to be a quick post – but I wanted to put it here for my own reference, since it’s something I have to look up pretty often. I might as well make my notes about it public so that others can benefit, too.

    What are ‘Contexts’?

    In Kubernetes, a Context is essentially the configuration that you use to access a particular cluster & namespace with a user account. In most cases, this will be your user account, but it could also be a service account.

    In my particular case, there are at least a few Kubernetes clusters that I need to access pretty regularly. We have one in our data center and two or three different clusters (depending on the day) configured in GCP to work on our migration there. When I need to work in one cluster, I need to remember how to activate the context that grants me access to that cluster.

    List Your Kubernetes Contexts

    kubectl config view -o jsonpath='{.contexts[*].name}' | tr " " "\n"

    This will show all your configured contexts in Kubernetes. I included the | tr ... to replace the spaces with newlines so that it’s easier to parse the results. This way, you can easily see the exact names of your contexts, so that you can easily switch between them.

    Show your Current Context

    kubectl config current-context

    This just shows your current context. It’s pretty self-explanatory, but I often forget the exact syntax that lists my context.

    Set your Context

    kubectl config use-context <context_name> 

    And this, not surprisingly, sets your context. So if you need to switch from your minikube context to your gcp-project-cluster-context, you just use this nifty command, and suddenly your commands are pointing at an entirely different cluster.