
As of last month (March 8th-ish, 2018), Let’s Encrypt supports wildcard certificates! This is great news, because it means that those of us who like using tons of subdomains can now get one cert for all our subdomains, rather than having to get a cert for every single subdomain.
As you may know, Certbot is the tool provided by the EFF that you use to interact with and issue certs from Let’s Encrypt. It used to be called letsencrypt-auto, but when the EFF took it over, it switched names to Certbot.
Now, it’s not quite as easy to get wildcard certs as it is to get normal certs – mainly because there are some prerequisites. The nice thing is, some of these prerequisites make it easier to issue and renew certificates without temporarily disabling your web server.
Prerequisites
The certbot docs aren’t super clear about a lot of this, so you have to do some digging, but essentially it boils down to this:
- Wildcard certificates are only available if you use the ‘DNS’ method of verification.
- DNS verification requires that you use a DNS provider with a supported API. This is because you need to be able to quickly create
TXTrecords so that Let’s Encrypt can verify them. You can do this manually, but it seems like a pain. The supported DNS providers for automatic updates are:
I’ve decided to just go with Google Cloud DNS, because I’m already doing some other stuff in Google Cloud Platform, and it’s really quite affordable for what I need. Sure, it’s not as cheap as just using the DNS that your registrar provides, but I know mine doesn’t provide an API, especially not one supported by certbot.
Setting up Google Cloud DNS
To get Google Cloud DNS set up, you’ll obviously need a Google account. If you don’t have one, well, I’ll leave it to you to get one. Then you’ll need to set up Google Cloud Platform – once again, I’ll leave that to you. You’ll also need to set up a project for your DNS records. If you already have a project, you can feel free to use that.
Set up a Service Account
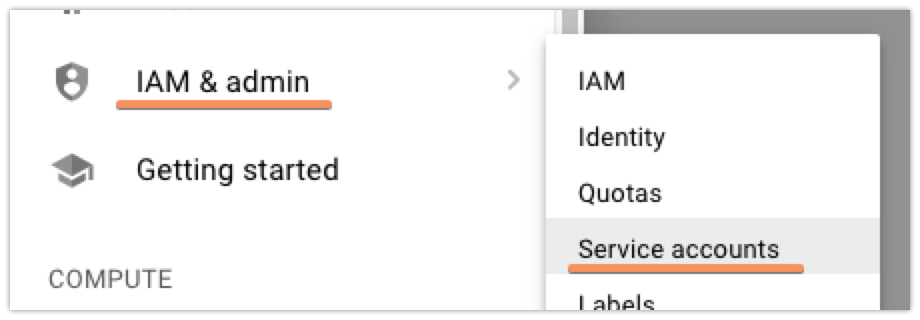
Next up, you’ll need to set up a ‘Service Account’ that will let you access the GCP DNS API with restricted permissions, so that you can safely put the credentials on a box that’ll handle your renewals without having to fully authenticate with GCP yourself. To start out, click the ‘hamburger’ menu on the left, then find ‘IAM & admin’, and finally ‘Service Accounts’:
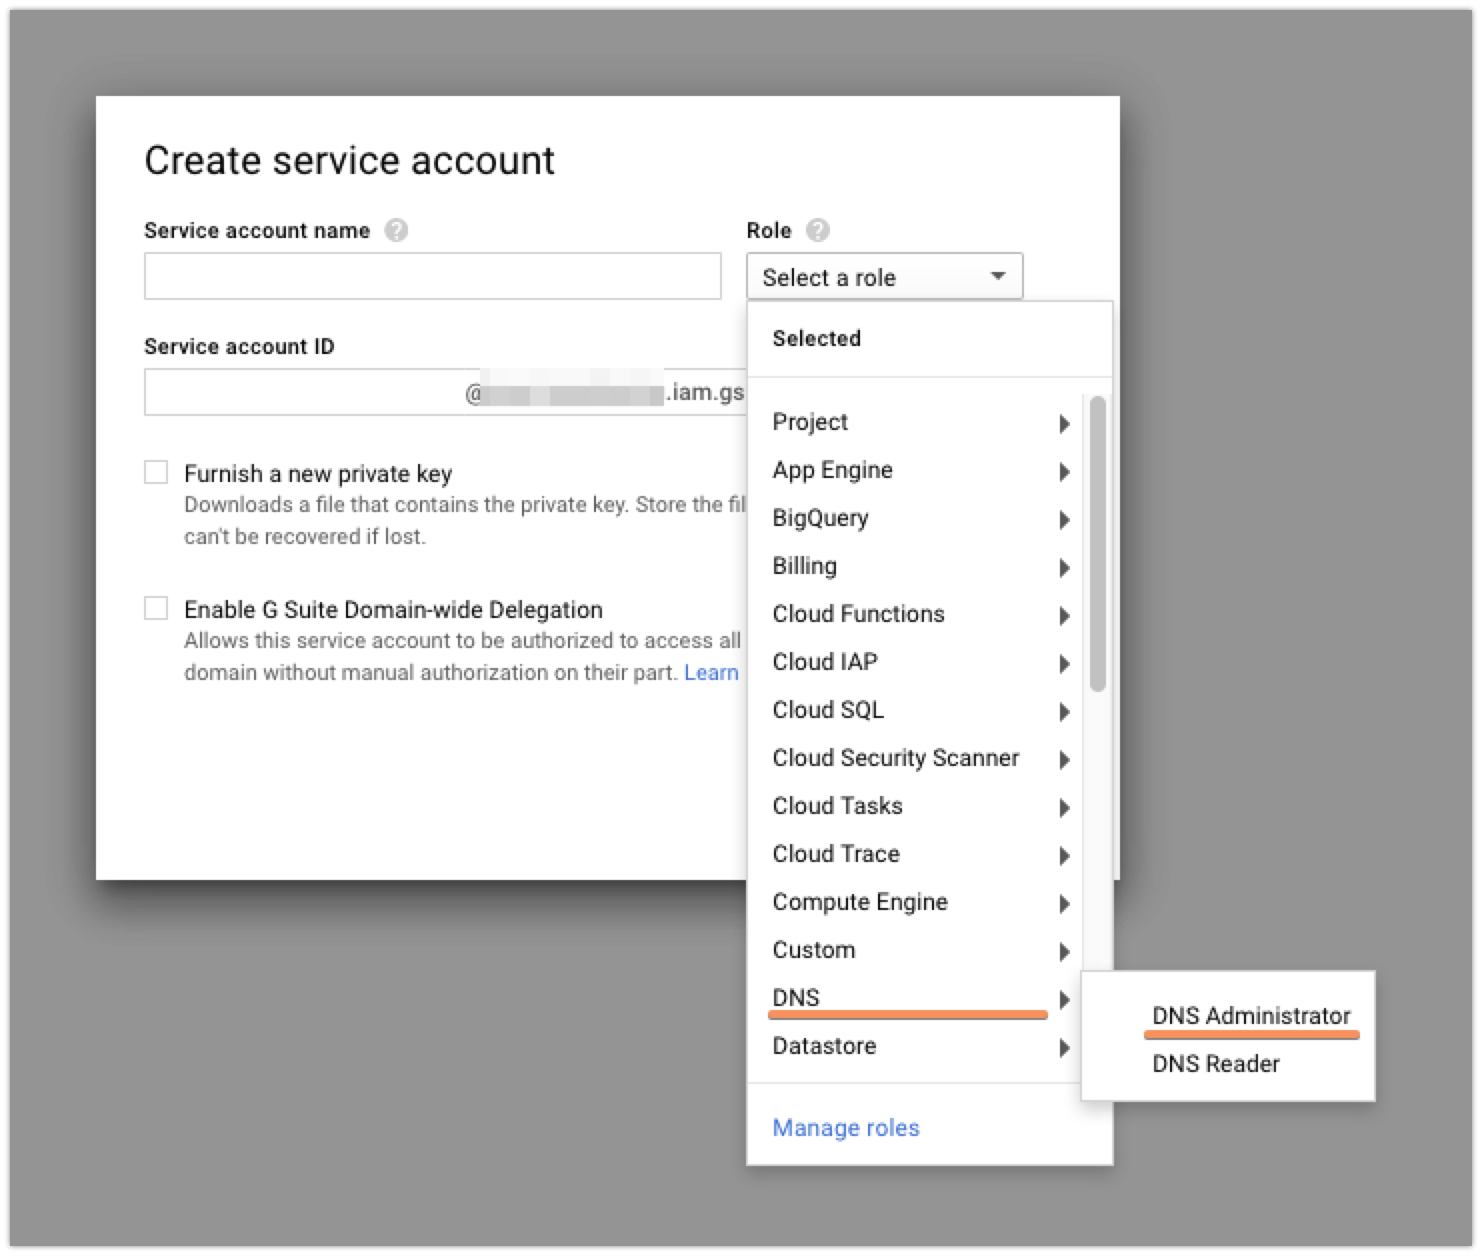
Once there, you’re going to want to click the ‘Create Service Account’ button at the top. Currently, the Cloud DNS permissions and whatnot are in beta, so that means that while you could create a custom role that would have exactly the permissions that you need, those are subject to change and there’s a decent chance that you’d need to recreate your service account later. To avoid this, I just made my new service account into a ‘DNS Administrator’. It’s got more permissions than I strictly need, but I’m not super worried about that.
After you give your service account a name, you’ll want to check the ‘Furnish a new private key’ box so that you can download the credentials file that you’ll need to access the API later:
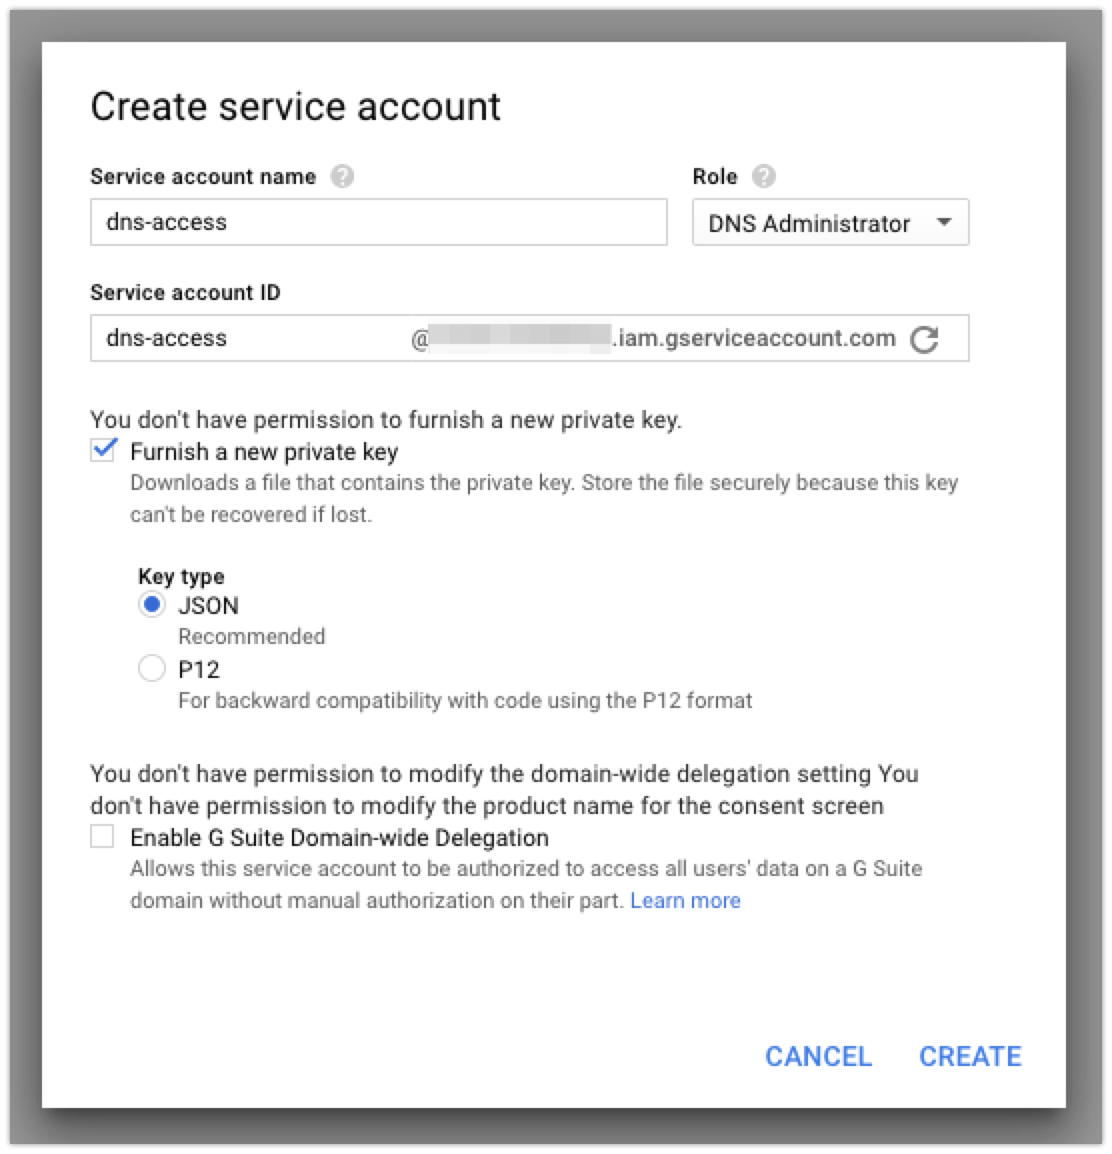
When you create your account, it should automatically download the JSON file with the credentials. I copied that key to the server I’m using to issue certificates (my good ‘ole Linode server!) so that I can use it later.
Creating your DNS Zone
Naturally, to do anything with DNS, you need to have a domain to do something with. You’ll have to point your registrar to Google/your DNS provider of choice before you can actually issue a wildcard certificate.
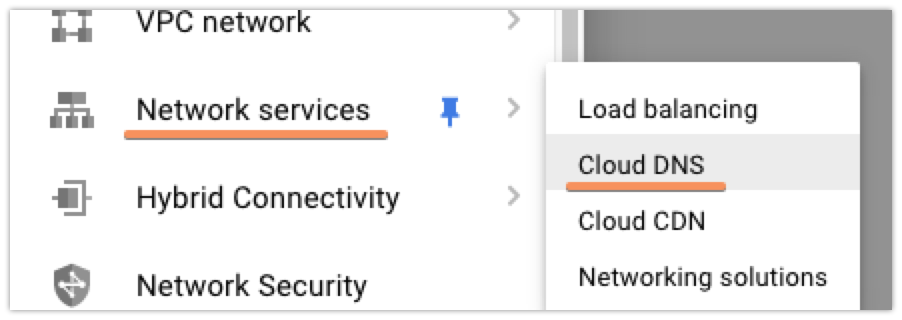
I set up my domain in Google Cloud DNS before I switched anything at my domain registrar, so that I wouldn’t have to worry about any downtime where my site was unreachable. To do this, you’ll first want to access the Cloud DNS control panel in GCP:
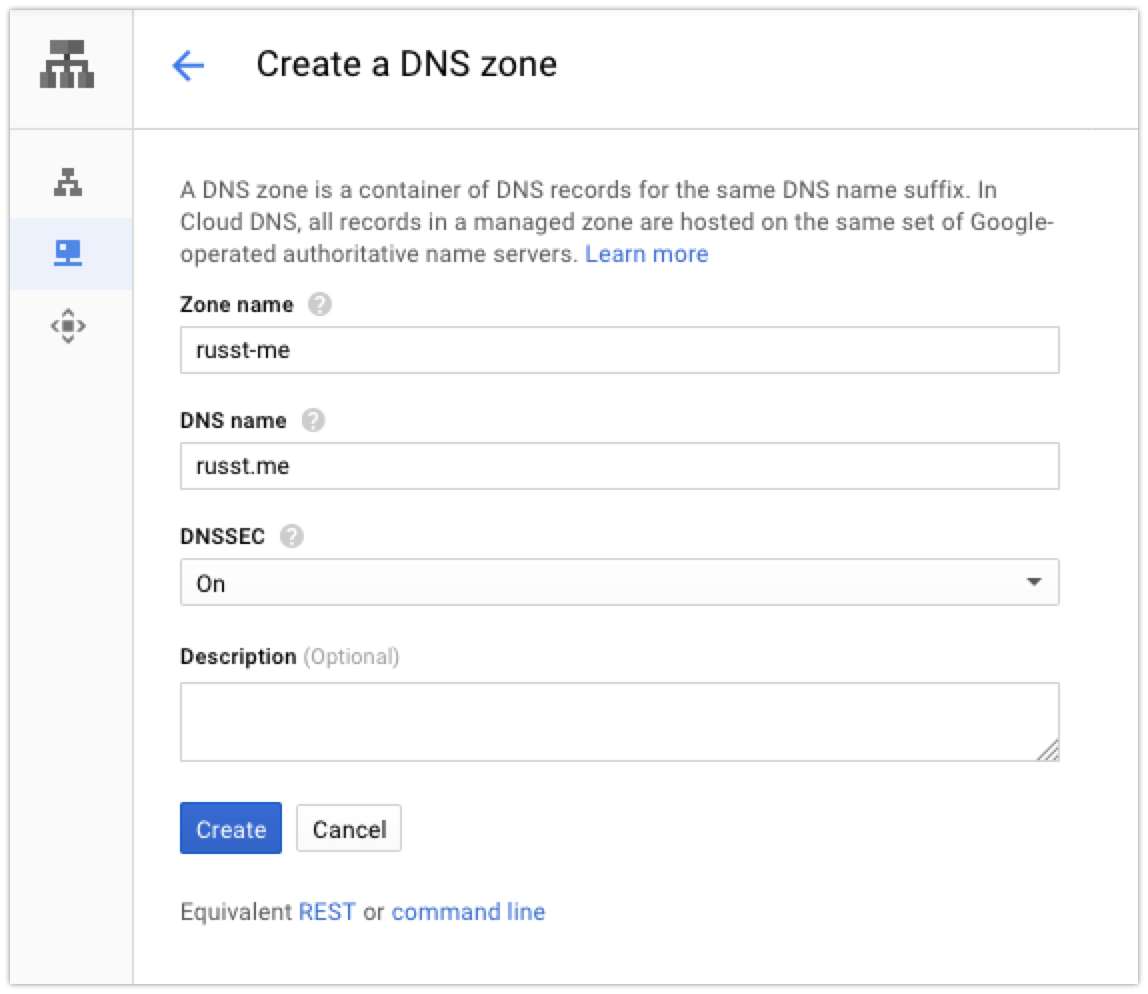
Next up, click the ‘Create Zone’ button at the top of the console. Then, you’ll enter the information for your domain:
Then you’ll create some records for your domain. At the very least, you’ll probably want one A record pointing to your server, but you can also create subdomains or whatever else you want. If you’re copying your config from somewhere else, put in all the records that you had on your previous provider. I had quite a few records, but even so it didn’t take very long.
Finally, you’ll update the nameservers to point to your DNS provider. I use a few different registrars, but they all make this part pretty easy. In this particular case, I was using Hover – all I had to do was click their ‘Edit Nameservers’ link near the domain I wanted to adjust, and put in Google’s nameserver addresses:
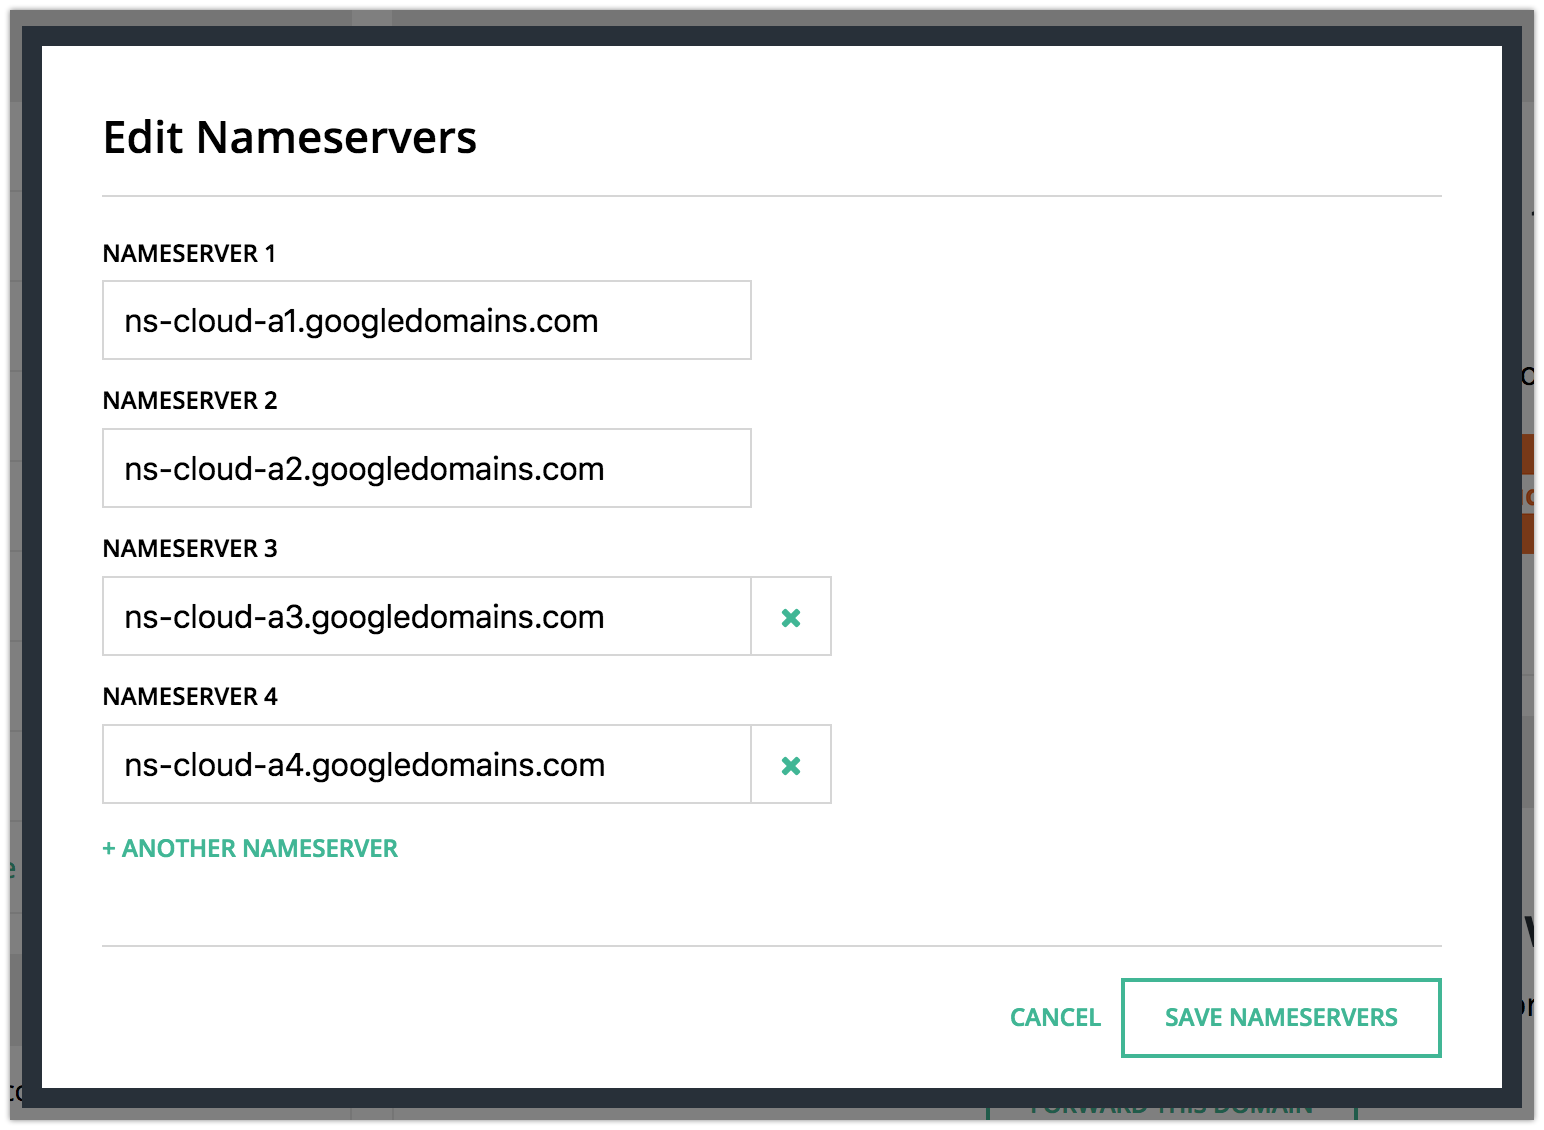
You’ll need to put in whatever your DNS provider wants, but if you’re using Google, the above should work. Once you’ve done that, you might have to wait a few minutes for your DNS to switch over to your new provider. It only took a couple of minutes in my case. I used the DNS lookup tool at MxToolbox to figure out when it switched. It shows your nameserver at the bottom, like this:

Once that’s updated to your new provider, you’re ready to get issuing certificates!
Using Docker to Issue the Certificates
Now, we can do something really nifty here to renew our accounts. Instead of installing certbot-auto on our server, we can just always use the latest up-to-date version in a preconfigured, lightweight Docker container. Sure, this requires you having Docker installed, but who doesn’t these days? If you’d rather, you can do this all manually with your own certbot-auto installation, but I chose to go the Docker route, for simplicity’s sake.
Now it’s actually pretty simple to just run our Docker container. We just need to get the correct arguments, and we’ll be good to go. Note, this does require that you have locations set up where you want to put your certificates, otherwise they’ll just float off into the ether when your container shuts down.
Configuring our Volumes
So first up, let’s create the place we want our certificates to be placed. In my case, I’m going to stick with the default, since my server has already been storing Let’s Encrypt certificates there anyway: /etc/letsencrypt. This is where Let’s Encrypt stores all its configuration and certificates by default. If you’re putting it somewhere else, go ahead and create that directory. Keep note of it for later, naturally. Later, we’re going to map our Docker container to use that as a volume.
Next up, we need to create the place where Let’s Encrypt will store backups. I guess this isn’t strictly necessary (mine is empty anyway), but I figure it can’t hurt. By default it’s in /var/lib/letsencrypt. So we’ll also be mounting that.
Finally, we need to mount the directory where you put your GCP service account’s credentials. I’ve put mine in ~/.secrets/certbot and changed the name to google.json, but you can put it wherever you want and call it whatever you want, really.
So these are going to end up being arguments like this when we run our docker command:
-v "/etc/letsencrypt:/etc/letsencrypt" \
-v "/var/lib/letsencrypt:/var/lib/letsencrypt" \
-v "/home/$(whoami)/.secrets/certbot:/secrets"
Docker & Certbot Arguments
The image that we’re going to be using (assuming you’re sticking with Google DNS) is certbot/dns-google. If you’re using another DNS provider, you can probably figure out pretty easily which image you’ll need.
In the command itself, we’ll also need to use the certonly command, signifying to certbot that we don’t want to have it try to actually install the certificates for us, we only want it to issue them. I personally prefer installing them myself anyway, and that would be very difficult and/or impossible to do from within a Docker container anyway.
We’re also telling certbot to use Google’s DNS with --dns-google, and we’re giving it the path to the credentials file with --dns-google-credentials <file-path>. The last thing we have to do is manually specify the Let’s Encrypt server that we’re using, because right now, wildcard certs are only supported by one server: --server https://acme-v02.api.letsencrypt.org/directory. That should do it for our arguments.
All this means that our full docker command will look like this:
sudo docker run -it --name certbot --rm \
    -v "/etc/letsencrypt:/etc/letsencrypt" \
    -v "/var/lib/letsencrypt:/var/lib/letsencrypt" \
    -v "/home/$(whoami)/.secrets/certbot:/secrets" \
    certbot/dns-google \
    --dns-google \
    --dns-google-credentials /secrets/google.json \
    --server https://acme-v02.api.letsencrypt.org/directory \
    -d '*.russt.me'
Of course, if you’ve made any adjustments in the way you’re doing this, you’ll need to adjust the command itself. The final line is the important one, -d '*.russt.me, is telling certbot to issue a new wildcard certificate for *.russt.me. You’ll want to make sure you change it, because, well, I’d rather you not issue certificates for my domain. Plus, unless you’ve hacked my Google DNS account, you probably don’t have access.
With any luck, you’ll see some output that looks a lot like this:
Saving debug log to /var/log/letsencrypt/letsencrypt.log
Plugins selected: Authenticator dns-google, Installer None
Obtaining a new certificate
/usr/local/lib/python2.7/site-packages/josepy/jwa.py:107: CryptographyDeprecationWarning: signer and verifier have been deprecated. Please use sign and verify instead.
  signer = key.signer(self.padding, self.hash)
Performing the following challenges:
dns-01 challenge for russt.me
Unsafe permissions on credentials configuration file: /secrets/google.json
Waiting 60 seconds for DNS changes to propagate
Waiting for verification...
Cleaning up challenges

IMPORTANT NOTES:
 - Congratulations! Your certificate and chain have been saved at:
   /etc/letsencrypt/live/russt.me-0001/fullchain.pem
   Your key file has been saved at:
   /etc/letsencrypt/live/russt.me-0001/privkey.pem
   Your cert will expire on <date>. To obtain a new or tweaked
   version of this certificate in the future, simply run certbot
   again. To non-interactively renew *all* of your certificates, run
   "certbot renew"
I’ve cleaned it up a bit, but that’s the gist. I chose to ignore the ‘Unsafe permissions’ warning, since I’m running this in a Docker container anyway and the file on my system actually does have the correct permissions.
Last Thoughts
I’ll leave the configuration and use of these certificates up to you. Hopefully, you have some idea of how to use the certificates on your own server. If not, there are guides all over that should help you out.
I’m extremely thankful to both the EFF and to Let’s Encrypt for enabling us all to issue free SSL certificates, and it’s even better now that they’re letting us issue wildcard certificates. If you’re also feeling thankful, head on over to the EFF’s donation page or Let’s Encrypt’s donation page and drop a donation for them. The web will thank you for it.
If you’ve got any questions or comments, feel free to drop them in the comments below! I’ll do my best to get back to you. Extra props if you correct an error or tell me a better way to do this.
Leave a Reply to Hatto Cancel reply