Author: russt

  • Using Docker for WordPress Theme & Plugin Development

    Using Docker for WordPress Theme & Plugin Development

    In the time since I actually learned something about deploying to the web, I’ve been extremely unhappy with my WordPress development workflow. As a result, I haven’t developed any WordPress themes or plugins in quite a few years. I’ve just used themes and plugins as-is, but I’ve finally decided that I want to actually build myself a decent theme.

    WordPress Development Challenges

    There are a few challenges associated with developing on WordPress. First, you (of course) want your theme/plugin files under source control, but they still have to be inside the WordPress directory (okay, you could solve this with symlinks). But then you’re still running a local install of Apache, PHP, and MySQL, or else you’re doing your development directly on a VM or something. I generally prefer not having MySQL and Apache running all the time on my development machine. And, as you may suspect, I certainly don’t want the core WordPress files under source control. That’d just make for plenty of trouble when upgrading WordPress or installing/enabling/disabling themes or plugins.

    A Containerized Solution

    Luckily, it’s actually really easy now to set up a docker-based solution. So you can develop and run the site locally, keep your files under source control, but not have to be running an Apache/MySQL/PHP stack on your development machine (at least not directly).

    First up, you’ll need to install Docker (if you haven’t already). I won’t go into the details here, but you can get a start by heading to the Docker Community Edition page. Once you’ve got it installed, create a new directory for your project (unless you’ve already got one). Inside that directory, create a new file called docker-compose.yml.

    We’re going to use Docker Compose, which is a tool which can launch multiple containers and link them together as necessary. This is super useful for use cases like ours, because we need to set up a container for both WordPress and MySQL. In your docker-compose.yml file, put the following:

    version: '2'
    
    services: 
        wordpress: 
            image: wordpress:php7.1
            ports:
                - 8080:80
            environment:
                WORDPRESS_DB_PASSWORD: super-secure-password
            volumes:
                - ./{DIRECTORY}:/var/www/html/wp-content/{themes/plugins}/{DIRECTORY}
        mysql:
            image: mariadb
            environment:
                MYSQL_ROOT_PASSWORD: super-secure-password
    

    Of course, you’ll want to replace super-secure-password with an actual password (not quite so important for local development), and replace the two {DIRECTORY}s with the directory that you’re developing your project in. In my case, it’s a starter theme. Finally, replace {themes/plugins} with the proper directory, depending on whether you’re developing a plugin or a theme. I used themes, since I’m developing a theme.

    Now, what this is doing is telling Docker that we want two images: One ‘WordPress’ image (you can see the list of available versions on this Docker Store page) and one ‘MySQL image’. In this case, I’m using mariadb.

    We’re then configuring the containers by passing them environment variables – the same password being passed to both images. This’ll actually let them connect to each other. In case you hadn’t guessed it, these are set up by the creators of each image to allow you to configure them on-the-fly.

    Finally, we’re mapping a local directory to /var/www/html/wp-content/..., which will place our local files in the correct directory in the actual WordPress container. It’s pretty awesome.

    All you need to do now is run docker-compose up, wait for your containers to start, and then access your brand-spanking-new WordPress development site at http://localhost:8080. You’ll have to go through the installation, and if you want to, you can load in some sample data. When you want to stop it, just hit Ctrl+C in that console. Finally, you can enable your theme/plugin in your WordPress settings.

    I’ll leave it up to you to decide how exactly you want to deploy it, though.

    Conclusion

    Docker compose makes this super easy, and it takes very little configuration to get up and running. The extra bonus is that you can check your docker-compose.yml file into your source control, and then you’ve got it saved for later development (or development from another machine). All you need is Docker (and an Internet connection, at least to start).

  • Running WordPress with TLS/SSL on Apache and Nginx as Reverse Proxy

    Running WordPress with TLS/SSL on Apache and Nginx as Reverse Proxy

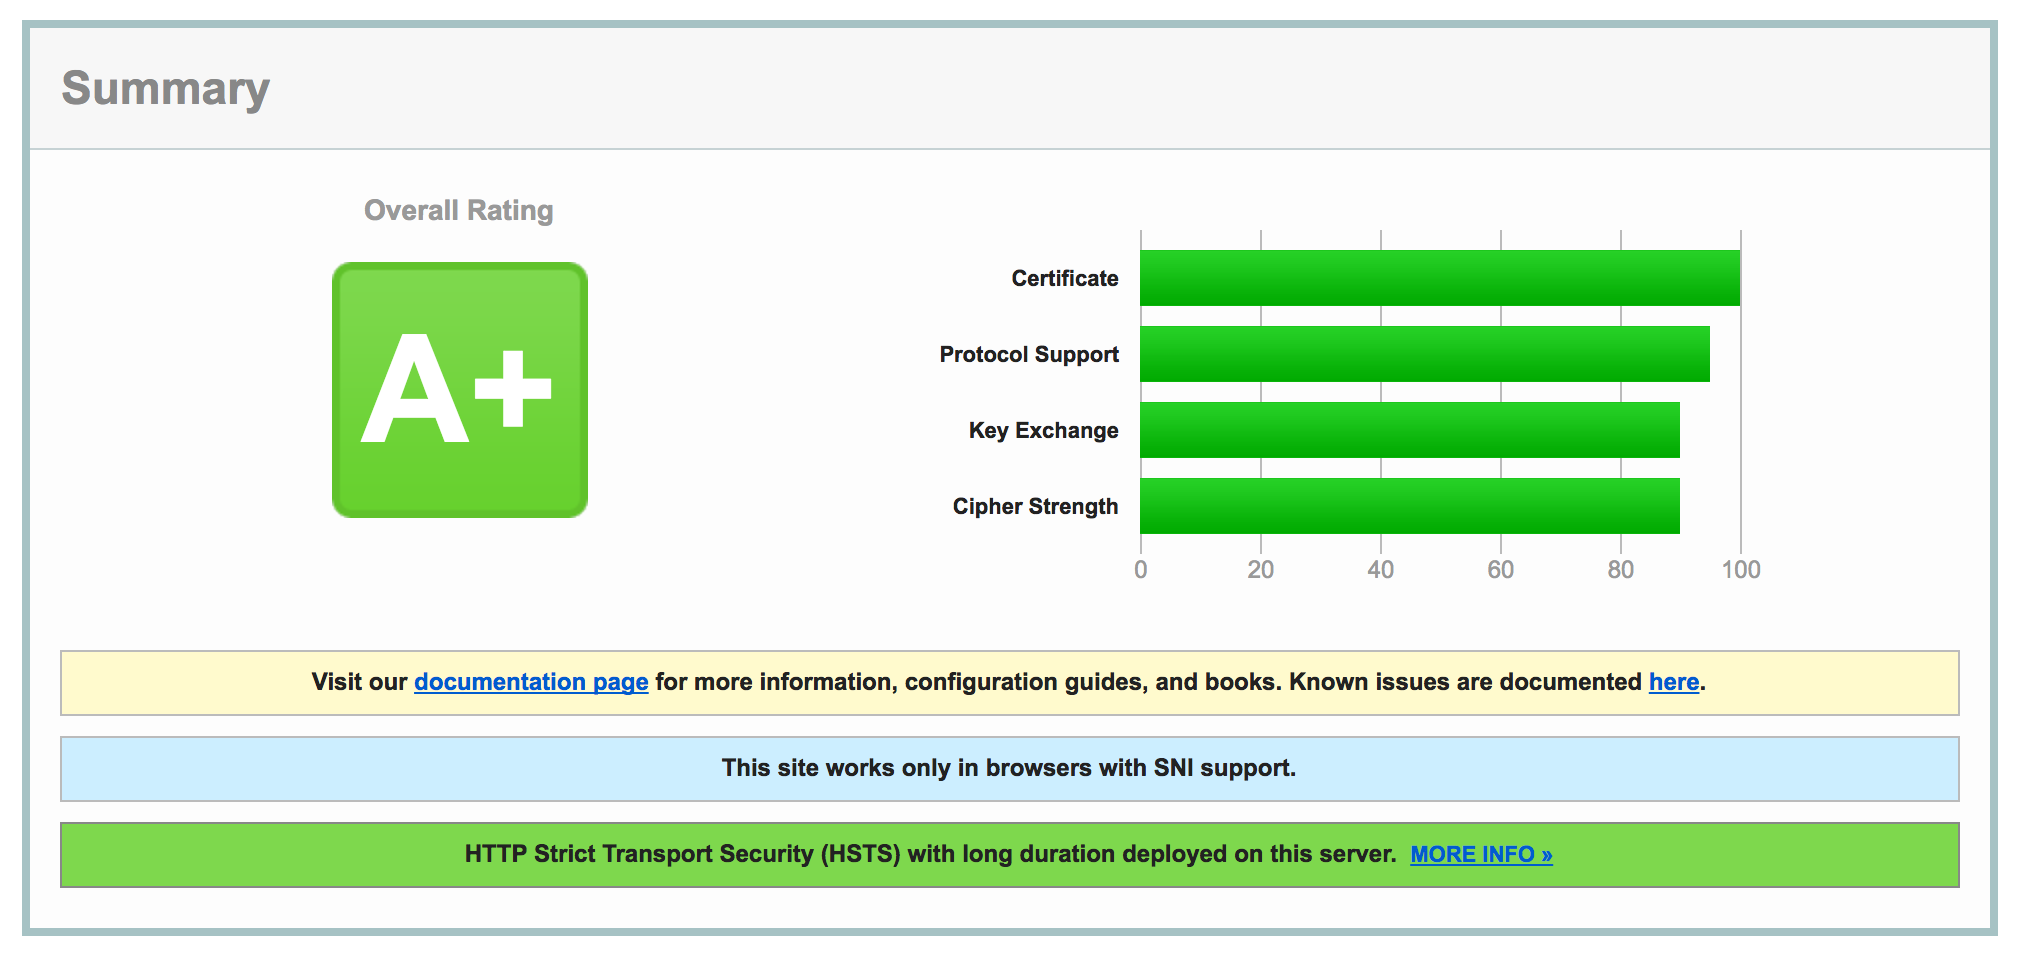
    Getting WordPress running properly on Apache with Nginx running as a reverse proxy is surprisingly difficult. It took me quite awhile to get all the moving parts in order, but it’s great once you get it all done. Plus, it’s really cool to get an A+ rating from SSL Labs:

    SSL Labs, russt.me A+ Rating

    Configuring Nginx for the Switch to HTTPS

    Luckily, I figured out the proper configuration to use for Nginx. It took me quite a bit of trial and error, but here’s a sample of the configuration you can use to facilitate your switch:

    server {
        listen 80;
    
        server_name example.com;
        server_tokens off;
    
        root /usr/share/httpd/example.com;
        index index.php index.html index.htm;
    
        location / {
            try_files $uri @apache;
        }
    
        location @apache {
            proxy_set_header X-Real-IP  $remote_addr;
            proxy_set_header X-Forwarded-For $remote_addr;
            proxy_set_header X-Forwarded-Proto $scheme;
            proxy_set_header Host $host;
            proxy_pass http://127.0.0.1:8081;
        }
    
        location ~[^?]*/$ {
            proxy_set_header X-Real-IP  $remote_addr;
            proxy_set_header X-Forwarded-For $remote_addr;
            proxy_set_header X-Forwarded-Proto $scheme;
            proxy_set_header Host $host;
            proxy_pass http://127.0.0.1:8081;
        }
    
        location ~ \.php$ {
            proxy_set_header X-Real-IP  $remote_addr;
            proxy_set_header X-Forwarded-For $remote_addr;
            proxy_set_header X-Forwarded-Proto $scheme;
            proxy_set_header Host $host;
            proxy_pass http://127.0.0.1:8081;
        }
    
        location ~/\. {
            deny all;
            access_log off;
            log_not_found off;
        }
    
        # We'll use this later
        # return 301 https://$server_name$request_uri;
    }
    
    server {
        listen 443 ssl;
    
        server_name example.com;
        server_tokens off;
    
        root /usr/share/httpd/example.com;
        index index.php index.html index.htm;
    
        ssl on;
        ssl_certificate /etc/letsencrypt/live/example.com/fullchain.pem;
        ssl_certificate_key /etc/letsencrypt/live/example.com/privkey.pem;
    
        # Ciphers recommended by Mozilla (wiki.mozilla.org/Security/Server_Side_TLS#Recommended_configurations)
        ssl_ciphers 'ECDHE-ECDSA-AES256-GCM-SHA384:ECDHE-RSA-AES256-GCM-SHA384:ECDHE-ECDSA-CHACHA20-POLY1305:ECDHE-RSA-CHACHA20-POLY1305:ECDHE-ECDSA-AES128-GCM-SHA256:ECDHE-RSA-AES128-GCM-SHA256:ECDHE-ECDSA-AES256-SHA384:ECDHE-RSA-AES256-SHA384:ECDHE-ECDSA-AES128-SHA256:ECDHE-RSA-AES128-SHA256';
        ssl_prefer_server_ciphers on;
        ssl_dhparam /usr/share/nginx/dhparams.pem;
    
        location / {
            try_files $uri @apache;
        }
    
        location @apache {
            proxy_set_header X-Real-IP  $remote_addr;
            proxy_set_header X-Forwarded-For $remote_addr;
            proxy_set_header X-Forwarded-Proto $scheme;
            proxy_set_header Host $host;
            proxy_pass http://127.0.0.1:8081;
        }
    
        location ~[^?]*/$ {
            proxy_set_header X-Real-IP  $remote_addr;
            proxy_set_header X-Forwarded-For $remote_addr;
            proxy_set_header X-Forwarded-Proto $scheme;
            proxy_set_header Host $host;
            proxy_pass http://127.0.0.1:8081;
        }
    
        location ~ \.php$ {
            proxy_set_header X-Real-IP  $remote_addr;
            proxy_set_header X-Forwarded-For $remote_addr;
            proxy_set_header X-Forwarded-Proto $scheme;
            proxy_set_header Host $host;
            proxy_pass http://127.0.0.1:8081;
        }
    
        location ~/\. {
            deny all;
            access_log off;
            log_not_found off;
        }
    }
    

    Now for some explanation of what’s going on in that configuration file. First, we catch any unsecured traffic – that’s the directive that says listen 80. This part is just a temporary provision to allow us to accept both HTTP and HTTPS traffic while we’re getting things set up. Later on, we’ll adjust the config to redirect all the HTTP traffic to HTTPS, forcing secured connections. For now, though, you’ll notice that the first server block for http and the second server block for https contain large blocks that are identical – that’s because for now they do pretty much the same thing – just one with encryption and one without.

    In our second server block, we actually configure the stuff that matters. First, we enable ssl and tell nginx where to find the TLS certificates. Next, we configure the ciphers that we’ll allow on this site. These specific ciphers are recommended by Mozilla for ‘modern’ compatibility. If you need to support older stuff, you’ll have to investigate allowing less secure ciphers.

    After that, we have several location blocks that tell nginx what to do with different requests. The first and second rules tell nginx to check for a matching file (that’s the try_files). If it finds a file, like an image, CSS, JS, etc., nginx will serve that file directly. If there isn’t a matching file, it passes it to @apache, which is defined in the next rule. Nginx is faster at serving raw files than Apache, so we want it serving files where possible.

    The next two location rules tell nginx to pass any requests for .php files or requests ending in / to apache, as well. We pass these to apache because it’s faster at handling php requests. In these cases, I’ve got Apache running locally on port 8081. We need to forward the headers and request host to Apache to make sure that Apache still knows what to do to handle the requests properly.

    Finally, the last location rule tells nginx to deny access to any files beginning in ., which are hidden files that really shouldn’t be shown to the public.

    With a quick restart of nginx, your new configuration should take effect.

    Configuring Apache

    Luckily, as far as configuration goes, nginx does most of the heavy lifting. It only forwards the appropriate requests to Apache, so our Apache configuration is pretty straightforward. Of course, the most important thing that you need to do is tell Apache to listen on a different port than nginx. By default, both nginx and Apache listen on port 80. I decided to tell Apache to listen on port 8081 by specifying that in my httpd.conf file – by changing the Listen line to Listen 8081.

    To configure my site, I simply used the following:

    <VirtualHost *:8081>
        ServerName example.com
    
        DocumentRoot /usr/share/httpd/example.com
    
        <Directory />
            Options FollowSymLinks
            AllowOverride None
        </Directory>
    
        <Directory /usr/share/httpd/example.com>
            Options Indexes FollowSymLinks MultiViews
            AllowOverride All
            Order allow,deny
            allow from all
            Require all granted
        </Directory>
    </VirtualHost>
    

    It’s a pretty simple configuration – just telling Apache what to listen to and where to find the applicable files. And that does it for our web server configuration! Finally, we just need to tell WordPress that it needs to just use https.

    Configuring WordPress

    You see, the primary difficulty with the WordPress portion of things lies in the fact that WordPress normally assumes it’s running on Apache, with no proxy set up.

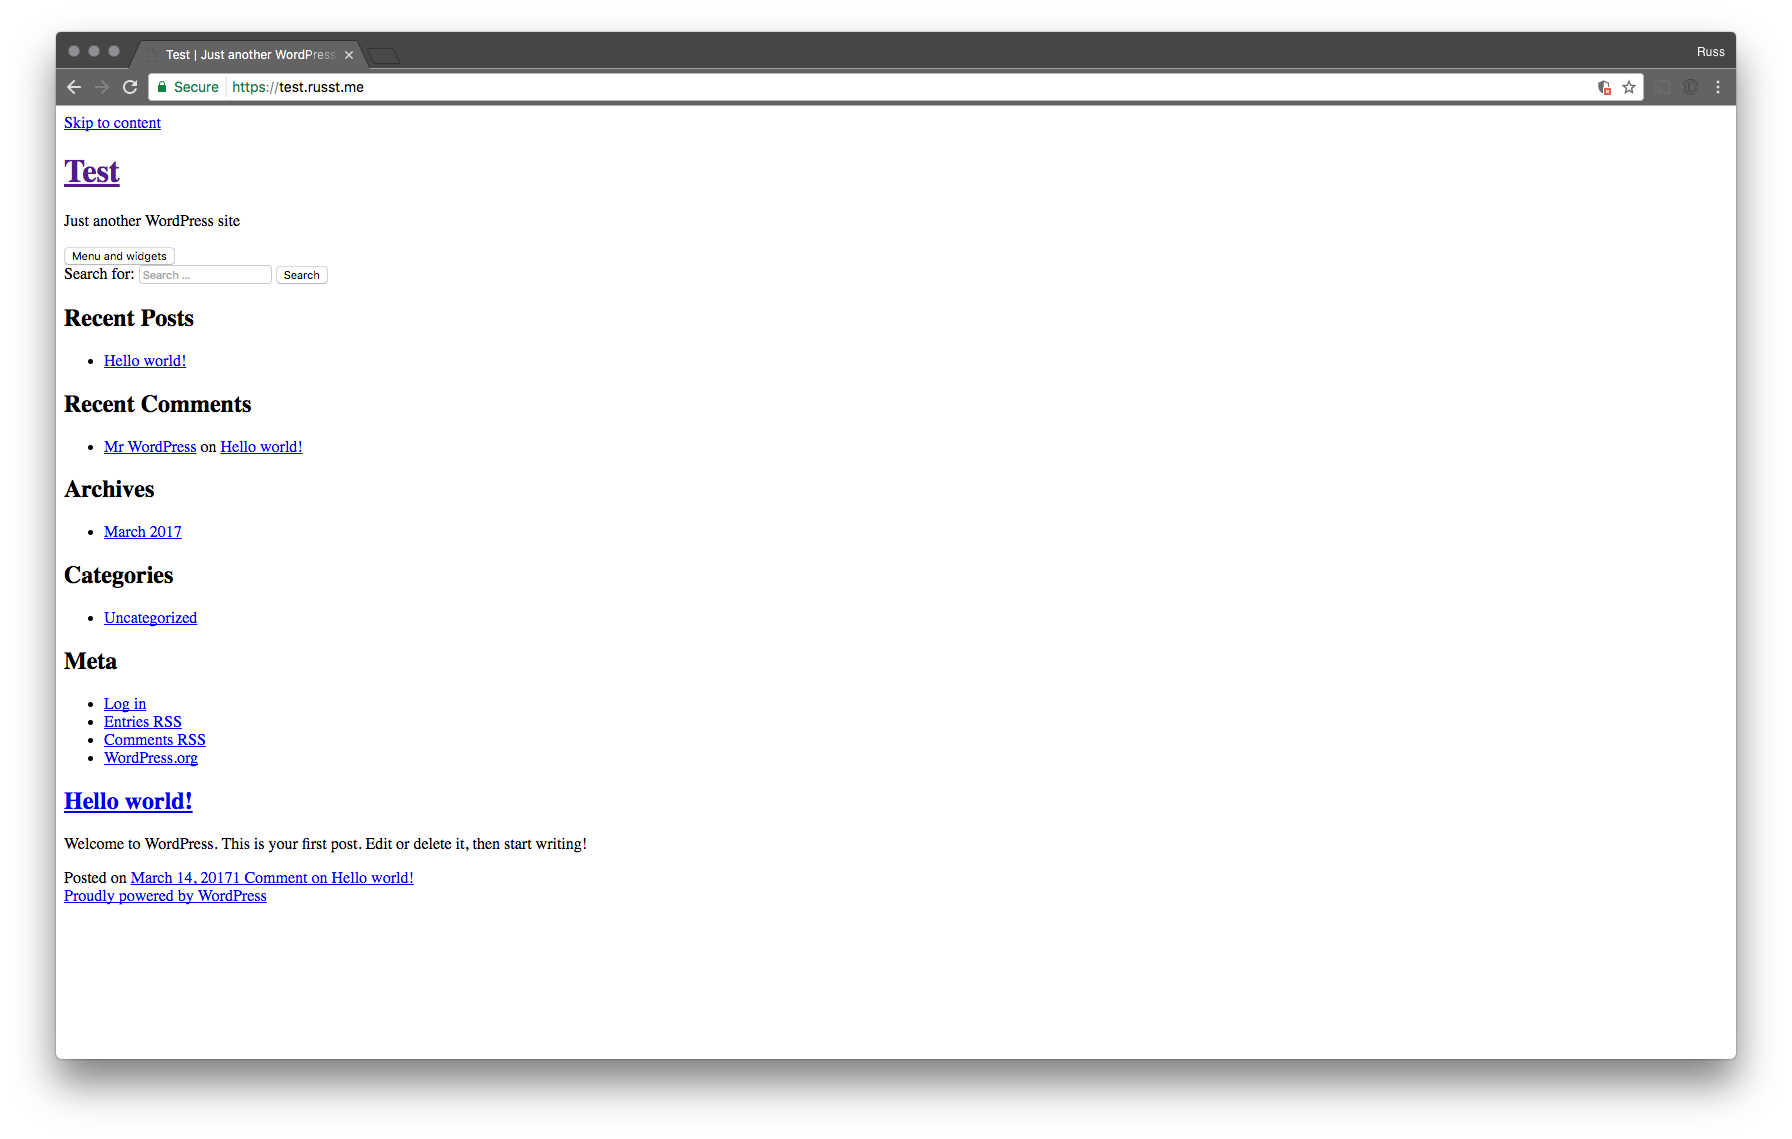
    Now, if you set up a redirect from http to https for your site before you set your site URL to https, your site wouldn’t be able to load any of your assets (unless you enable mixed-content). It makes your site look awesome:

    SSL Enabled, no Assets

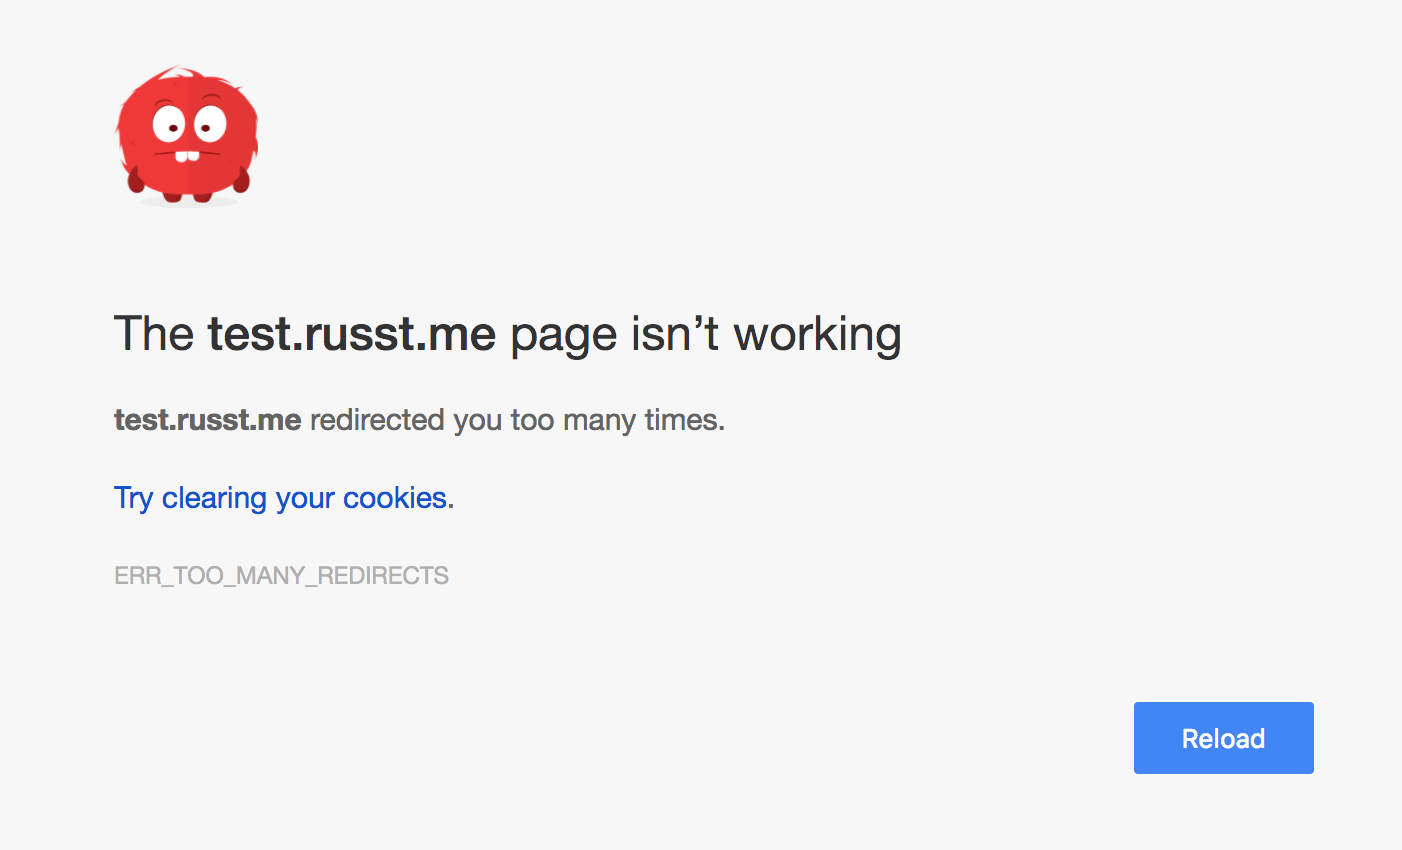
    What’s better is that if you tried to access your control panel, you would end up stuck in a redirect loop, endlessly going from HTTP to HTTPS and back. It results in your browser showing something like this:

    ERR_TOO_MANY_REDIRECTS

    But since you’ve got your web servers configured to temporarily allow http, this is a pretty easy fix. First, log in to your control panel. There, you’re going to need to access ‘Settings ▶ General’. Finally, update both your ‘WordPress Address’ and ‘Site Address’ to use https instead of http.

    Next, we need to configure a couple of settings in our WordPress installation’s config.php file. These are pretty simple, and the process is outlined in the WordPress documentation. We need to add the following lines to config:

    define('FORCE_SSL_ADMIN', true);
    if (strpos($_SERVER['HTTP_X_FORWARDED_PROTO'], 'https') !== false)
        $_SERVER['HTTPS']='on';
    

    These lines tell WordPress that we want to use the control panel over HTTPS. If we leave these out, we end up in the endless redirect loop I mentioned up above. Now, you’re ready to force all your traffic to use HTTPS.

    Update Site Addresses

    Force Encryption

    Finally, we’ve got to make the final adjustment to our config, that will force all traffic over HTTPS. It’s really straightforward – just change the first server block in your nginx config file to something like this:

    server {
        listen 80;
    
        server_name example.com;
        server_tokens off;
    
        return 301 https://$server_name$request_uri;
    }
    

    All this does is return a 301 Status Code, telling users’ browsers that an address has moved permanently – all major browsers will automatically redirect them to the exact same address, but using https instead. It’s a simple way to force traffic to use https.

    With one final restart of nginx, you’re good to go! All your wordpress traffic will be set up to use https.

  • Open Wi-Fi & Wireless Security

    Open Wi-Fi & Wireless Security

    I’ve recently been thinking about Wireless Security, and the way it relates to ‘public access points’. It seems to me that it’s very difficult for us to avoid public networks altogether (whether we’re at a hotel, a coffee shop, or really anywhere else). Sometimes, we really need to connect, even if we have some burning desire to avoid all public networks.

    I’ve seen all sorts of recommendations on how to ‘solve’ this, usually involving ‘securing’ the network with encryption. This sounds good, since some encryption is better than none, right? Even if you make the password public, by writing it on the wall or putting it in the network’s name, you’re still ‘securing’ the network, right?

    Unfortunately, even for ‘secure’ Wi-Fi, we’re most often still using what’s called a PSK (a Pre-Shared Key). The problem is, it’s just that – it’s a key that everyone using the network shares. That means that the guy in the corner on the same network, even though you’re both using ‘secure’ Wi-Fi, can still decrypt everything you send. PSK’s provide no additional security over an open network, except that the attacker at least has to know that key.

    The only exception to this is WPA-Enterprise, which is normally used as just that, an enterprise connection. It requires quite a bit of setup, and it’s far too painful for most of us to mess with. Not only that, but it really makes it difficult to have an ‘open’ network.

    So, with all that said, what can we actually do to be secure on public Wi-Fi? Truthfully, the best thing we can actually do right now is use HTTPS everywhere. While it’s been trivial to create a secure connection between two individuals for quite some time, the difficulty lies in verifying that the person/system that you’re connecting to is in fact who they say they are, and not some Man in the Middle.

    With HTTPS, this is handled through the creation and verification of SSL certificates by Certificate Authorities, who verify the ownership of certain keys, so that you can be sure that when you go to https://google.com, you’re actually communicating with Google, not someone else.

    But with wireless networks, this would be much harder. Short of requiring every public network owner to submit themselves to some method of verification that was then publicly shared with everyone, it’s actually impossible to do so.

    Truthfully, I wish I had something better to say. But unfortunately, the best course of action for public networks is to get every website to use HTTPS – even though it doesn’t protect everything, it’s the best we’ve got. So get out there and get your certificates!

    Of course, you can always use a VPN, which will give you better security, at the expense of some speed and whatever subscription cost you have.

  • HTTPS for free with Let’s Encrypt

    HTTPS for free with Let’s Encrypt

    If you’re anything like me, you’ve probably wanted to add HTTPS to your personal sites or apps, without having to shell out the money to get a certificate from a certificate authority. Of course, self-signed certificates were always an option, but it really kind of sucked to have to always either bypass warnings or install the certificate everywhere. Oh, that and the fact that my Android phone would warn me every time I booted that someone could be eavesdropping on me.

    For that reason, I haven’t ever used an SSL certificate on my sites, except for the occasional self-signed cert. Luckily, finally, Let’s Encrypt has come along to save the day (well, they’ve just entered public beta). They’re an automated and free certificate authority, and they make getting a certificate a breeze. Heck, if you have a matching configuration, the whole process is already automated.

    Installing Let’s Encrypt

    Installation is super easy – the official (and almost assuredly up-to-date) instructions can be found on the Let’s Encrypt website, but it’s definitely quite simple. In most cases, the easiest method is to clone the letsencrypt repository from github:

    git clone https://github.com/letsencrypt/letsencrypt
    cd letsencrypt
    

    You can see if it’s available via your distro’s package manager and install it that way, too. I haven’t found it in either yum or apt-get yet, so your mileage may vary.

    Getting a certificate

    If you happen to be running a supported configuration (as of right now, just Apache running on Debian or Ubuntu), then you can let it take care of all the dirty work for you: ./letsencrypt-auto --apache (though probably with sudo). That should take care of everything for you. I haven’t tried it personally, but I’d imagine it’s pretty sweet. If you try it and it works, then you can feel free to skip the rest of this article, because it probably won’t help you much.

    Otherwise, you’ll want to go the certonly route to obtain your certificates. It’s still super easy, and the configuration itself isn’t super difficult.

    To obtain your certificate, first ensure that your DNS A record is pointing to the correct server. If you don’t, well, then this certainly isn’t going to work.

    Webserver Considerations

    In order for Let’s Encrypt to verify that the DNS record in fact points to the server that you’re using, it needs to temporarily place a file in your webroot. This allows it to prove that you really do have control over the DNS records for that domain. You can do this one of two ways:

    1. By specifying the --webroot flag when you run letsencrypt
    2. By temporarily stopping your web server so that letsencrypt can spin up its own

    Depending on your site’s configuration, one may be easier (or less disruptive) than the other. In my case, the servers I’ve configured thus far haven’t had an easily accessible webroot, so I just shutdown my webserver (sudo systemctl stop nginx.service in my case, on CentOS 7) while I obtained the certificate.

    Get Your Certificate

    Once you’ve taken care of that, run ./letsencrypt-auto certonly -d example.com to obtain a certificate for your domain. Or, if you’re using the webroot flag, execute ./letsencrypt-auto certonly --webroot -w /var/www/example / -d example.com without shutting down your webserver. For more details, see the ‘How it works’ page on Let’s Encrypt’s site.

    Your certificate files will be placed in /etc/letsencrypt/live/example.com/ (naturally, replacing example.com with your address).

    Configuring your webserver

    I’ve gradually been configuring a new server with Ansible (which is a whole story in itself), and in the process, I’ve switched over to using Nginx as the primary web server with a reverse proxy setup to direct other requests where necessary. As a result, my direct experience with Let’s Encrypt is limited to Nginx, but I know it’s similar with Apache or whatever else you might be using.

    For me, setting up https for my sites just involved the following:

    1. Adding a redirect from the insecure HTTP site to the HTTPS site
    2. Adding a second directive in the server configuration for port 443
    3. Enabling SSL on that configuration
    4. Specifying the location of the certificate files

    In Nginx, the redirect looks like this:

    server {
        listen 0.0.0.0:80;
        server_name example.com;
        server_tokens off;
        return 301 https://$server_name$request_uri;
    }
    

    This tells Nginx to listen on port 80 for requests to example.com, then return a 301 code saying that the requested resource has moved permanently to the same address, but with https:// instead of http://.

    In similar fashion, configuring the SSL portion of the site is quite simple, and goes something like this:

    server {
        listen 0.0.0.0:443 ssl;
    
        server_name example.com;
        server_tokens off;
    
        ssl on;
        ssl_certificate /etc/letsencrypt/live/example.com/cert.pem;
        ssl_certificate_key /etc/letsencrypt/live/example.com/privkey.pem;
    
        root /var/www/example;
    }
    

    If you’re using Apache, you’ll probably need to use another one of the certificate files, but I’m not entirely sure which at this point. However, if you need more info about that, I’d recommend checking out Apache’s documentation on SSL.

    Final Notes

    There are a few more considerations with these certificates. Though they’re supported by all major browsers, which is awesome, there are a few places that are lacking – for example, I’ve noticed that GitHub’s web hooks don’t realize that the certificates are valid. It seems like this might be something related to OpenSSL, but I haven’t had time to investigate it yet.

    Also, these certificates expire after 90 days, so they need to be refreshed fairly often. However, since obtaining the certificates is so easy and it’d be super easy to script, it’s something that you could easily add as a cron job. It’s what I’m planning to do in the near future.

    Hopefully this was helpful. Feel free to chime in if you’ve got any questions or comments!

  • A Refresh

    A Refresh

    I was going to title this post A New Beginning, but then I realized that all beginnings are really new, aren’t they? It just seemed a bit repetitive. That said, I’m writing this to inform you of my intention to update this blog on a more regular basis. Initially, I intend to write at least once a month, perhaps increasing that to once a week soon thereafter.

    I’ve also realized that, since this is my personal blog, I shouldn’t restrict what I post here to just one topic. While I don’t intend to just write about my life, I also shouldn’t just make this about technology.

    So, I guess what I’m getting at is that I’ll be posting here more often, sometimes about tech discoveries or thoughts, sometimes about things that I’ve developed, and sometimes just about thoughts I have about random topics. After all, why restrict yourself to just one thing? We all have varied interests, and I want my space on the web to reflect that.

  • User Lists in Twitch’s IRC with ZNC

    Twitch’s IRC is, well, not like most IRC. They’ve modified it in so many ways, it’s difficult to still even consider it IRC. But hey, at least we still can connect to their chat services using IRC. I guess I shouldn’t complain.

    Anyway, one of their most recent changes was removing join/part messages completely from default chat, unless you specifically request permissions. That means that your IRC client won’t see a members list at all for a channel. Luckily, a simple command still gets you the join/parts, so that you can still at least see the members list.

    All you need to do is run this IRC command before joining channels to request the capability:

    CAP REQ :twitch.tv/membership
    

    Unfortunately for me, I’m using ZNC, which makes it more difficult to run this. However, once again, a little bit of googling found a solution. All you need to do is enable the perform module and have it execute the CAP REQ command above when you join the server. To enable it on ZNC, just run the following commands in any IRC client connected to your ZNC’s Twitch instance:

    /msg *status loadmod perform
    /msg *perform add CAP REQ :twitch.tv/membership
    /msg *status disconnect
    /msg *status connect
    

    After ZNC reconnects to twitch, you should be getting membership lists from your Twitch channels!

  • Obnoxious Bugs in CSS3 Columns

    CSS Columns in Practice

    I got pretty excited when I found a promising application for CSS columns in a project I’ve been working on for my wife – she sells Dog Collars and Toys on Etsy, and we’ve been collaborating on creating a site to complement her Etsy shop. I figured that CSS columns would be the perfect way to responsively show the different styles she offers and materials she uses in her collars. Unfortunately, as I played around with actual layouts, I found that the implementation of columns in the various browsers is pretty flawed.

    Issues

    Thus far, I’ve tested out the same column layout in Chrome 40, Firefox 35, and Safari 8. Each one has its own bugs and quirks. I’m sure Internet Explorer has its own issues, too. In any case, though CanIUse.com shows over 90 percent support for the feature, none of that support is without issues. Sad day.

    Chrome’s Bugs

    Chrome has a couple apparent bugs in its columns implementation.

    Chrome can't figure out height...

    First, Chrome fails miserably at correctly calculating the height of elements in columns. Therefore, after ending a column, or after attempting to use column-span: all, an unsightly empty space appears between the end of the columns and the beginning of the next content. Ugh.

    Transitions, but only on one side...

    Secondly, Chrome can’t seem to render transitions in anything but the first column. Why this is, I’ll never understand. But hey, it’s there, and there’s currently nothing you can do about it.

    Firefox’s Bugs

    Firefox, on the plus side, only has one real issue. Unfortunately, it’s a pretty big issue if you want to have elements that span multiple columns using column-span. Otherwise, you’ll probably never even notice it. Unfortunately, column-span is something that I wanted to use.

    Firefox and no column-span

    Safari’s Bugs

    Safari, inexplicably, can’t figure out column-span either, but in an entirely different way. Rather than not spanning them at all, it decides to duplicate certain elements both above and below the element that uses column-span. Fun stuff!

    Safari's column-span duplication

    That’s That

    Unfortunately, now I’ve got to seek out some other method of laying out my columns. Maybe I’ll have to revert to using good ‘ole float with all its quirks, and just add in the responsive magic myself. At least its quirks are well-documented. In any case, I’ll figure something out, and perhaps post it here when I figure it all out.

  • ‘Download to Phone’ in Google Music

    2014-10-06 20.37.24

    I’ve been a happy Google Play Music All Access subscriber since the service was initially introduced. The thing that hooked me wasn’t just that it had a great selection of the music I like, but also that I could add my own music to their cloud if they didn’t have it. The ability to add your own music to your music streaming service is, well, pretty dang awesome.

    Anyway, the one thing that I’ve been a tad bit frustrated with is that, while I’m listening to music on my computer, I can’t select any option to download that album, track, or whatever to my phone. I love being able to install apps to my phone without picking up the phone, but not being able to download music to my phone without picking it up, opening the music app, finding the album, and selecting the ‘Download’ option was a tad bit frustrating.

    Well, I’ve just discovered a solution: Create a playlist called something like ‘Download to Phone’, tell your phone to download that playlist, and any time you want something downloaded to your phone, just add it to your ‘Download to Phone’ playlist. Next thing you know, you’ll have that music on your phone for your offline listening adventures!

  • Building a Better Data Generator

    Photo by Marcin Ignac on flickr
    Photo by Marcin Ignac on flickr

    In my capacity as a Quality Engineer at a company building data analysis software, I often find myself looking for quality data sets that I can use in my testing. Sometimes, I take the time to find some real data that fits my needs, but oftentimes it’s impossible (or takes far too long) to locate any such data set. In these circumstances, I find myself either writing a simple script to generate data or just creating some tiny amount of data that meets my needs.

    Unfortunately, this takes too much time, and doesn’t generally yield the quality of data that I’d like to see. It’d be nice to have something to generate better quality data on-demand.

    Current Issues

    Though a number of data generation tools exist, I find them lacking at times, especially in generating non-tabular data. Most of theme are capable of creating some decent data, but this doesn’t extend to things like documents, comments, or links between separate entities or distinct types of entities.

    Some of these tools, however, are super useful. A couple that I’ve used (and liked, with the shortfalls listed above) include Generate Data and Mockaroo. In terms of document generators, I’ve never actually found one. The only document generator I’ve ever used was one I created, but it was written for one specific purpose, and with only one format.

    A Better Way?

    I think that in order to have something really valuable, it needs to build upon previous generators. It needs to be flexible enough to generate any sort of data given a pattern to follow, whether it’s numeric, string-based, or an entire document.

    Realistic Data

    It needs to generate realistic output from those patterns. It needs to be able to choose values from a set that’s widely varied, but do so in a way that reflects realistic distributions on the data.

    For example, given a set of names, it doesn’t make sense to choose names at random. Names like ‘Jacob’ occur much more often than names like ‘Deantoine’. Numbers for amounts, like financial transations, generally follow Benford’s Law. And ages aren’t just random. The probability that a random individual is 102 years old vs. 22 years old is quite large.

    Accessible Data

    The generator should be widely accessible via an API, so that developers can directly access data that meets their needs. This would allow access on the fly, and could allow periodic calls to simulate things like user sign-ups, message traffic, etc.

    Open Source

    Finally, I think it should be open source. Open source applications allow anyone to contribute, build upon, and improve existing applications. With a utility that’s widely usable, I think this is the only way to go.

    Development

    On that note, I’d like to say that though I know it’ll take a lot, I’m going to begin the development of such a system. I’ll be putting the code on Github, as you might expect from an open source project. If you’ve got any thoughts, feel free to drop them in the comments below!

  • Automatic Deployment with Gitolite

    About Gitolite

    About a year and a half ago, I came across a great open-source git repository management tool called Gitolite. It’s a great tool for hosting and managing git repositories. It worked especially well for me because I run my own web server where I could set it up. If you’d like to give it a try or read up on it, I suggest you visit the Gitolite documentation.

    Why Automatic Deployment?

    Now, having worked in web development for at least a few years, I wanted a simpler way to automatically deploy my sites. Ideally, this should use Git. I’ve become quite fond of Git, so I’ve been using it for all my projects lately. Before I even open a text editor to start a new project, I’ve usually already typed git init (or, as it is with Gitolite, git clone).

    There’s something to be said for entering git push and having your commits reflected live on the web. It’s not something you want for every site, but it can certainly be useful when you want it.

    Getting it Set Up

    If you’ve managed to get Gitolite set up, you probably won’t have much trouble with getting the rest figured out. If you do happen to have some questions, I’ll do my best to answer them.

    In order to set up your automatic deployment, you’ll need direct access to the gitolite account on your server. As a matter of fact, having root access would probably be helpful. Because unfortunately, the autodeployment isn’t something you can just set up using the gitolite-admin repository (for some very good security reasons, I might add). With that in mind, follow along with the steps below.

    1. Add your web server user and your gitolite user to the same group. While this probably isn’t strictly necessary, it’s what I decided to do to make it work. Mainly, you just need your web server to be able to properly access the files that your gitolite user will be checking out.

      In my case, I simply created a new group and added both users to that group using usermod (check out usermod’s man page for more info). However, as I said, you can handle this however you’d like to, especially if your UNIX knowledge surpasses mine (which certainly wouldn’t surprise me).

    2. Create your repository and deployment directory.

    3. Change your deployment directory to allow the gitolite user access. This will depend on exactly how you handled things in step 1, but if you followed my pattern, I’d suggest changing the group of the directory to the group you added in step 1. In case you aren’t completely familiar with how you do this, you can try chown user:group directory -R on your target directory (More info here).

    4. Add the following to your /home/{gitolite_user}/.gitolite/hooks/common/post-receive script:

      if [ "$GL_REPO" == "gitolite/path/to/repo" ]; 
          git --work-tree /path/to/webroot --git-dir ./ 
          find /path/to/webroot -type f -print | xargs chmod 664 
          find /path/to/webroot -type d -print | xargs chmod 775
      fi
      
    5. Modify the script (from above) as needed. Basically, this script will run any time a repo is pushed to the server. If the repo matches the path you put in, it’ll execute the script within the if statement. That simply checks the repo out to the directory you specify, then adjusts the permissions on the files and subdirectories. You can modify the script as needed, because your specific case may need some special treatment.

    6. Push to your repo!

    Hopefully I’ve covered everything. If you try this tutorial and run into problems, let me know in the comments and I’ll do what I can to get you sorted out.